Wednesday, October 24, 2012

Eight Legs?

Isn't it fascinating how something so small can create something so magnificent?
Spiderwebs 
They are so cool to explore, learn about, and discover.


This time of year the spider webs just glisten in the morning sun.. Amazing how sturdy they are to just blow in the wind and not get destroyed!!
 
 
Fun Facts
-not all spiders spin webs.
-the silk is liquid until it hits the air and hardens.
-the silk is actually made of 4 strings combined together, not one.
-webs come from 4 glands on the abdomen called spinnerets.
-larger spiders can actually catch animals such as birds or bats in their strong webs!
 
 
Weaving Webs: Paper plate with whole punches along the edge. Tie a string onto one hole. At the other end of the string attach a small piece of pipe cleaner, this will be used to weave the web and when finished attach a spider ring to the pipe cleaner. This is great for fine motor skills. For younger children make sure the string isn't too long or it becomes frustrating for them to weave.
My preschoolers had a lot of fun with this project and they were extremely excited to take it home to play with. Next time I'd like to have some flies to attach as well.
 
For older children you could teach them how to make a dream catcher.
 (This site has a good tutorial - http://www.nativetech.org/dreamcat/dreminst.html ) Comparing a real spider web to your homemade dream catcher would be interesting.
 
 
Movie night:
Charlotte’s Web, the classic children’s story about Wilbur the pig and his spider friend, Charlotte.
 
 
We are going to try to set aside  this Saturday evening with no guests, no computer, no TV and all sit down as a family to watch a movie together, which will be "Charlotte's Web".
 
Spiders Still freak me out....


Saturday, October 13, 2012

Full Bellies, Happy kids

Lots of parents are nervous about bringing their kids into the kitchen – I was too!
I was also doing that crazy balance of trying to entertain kids while cooking dinner and it never seemed to go smoothly. One day I realized if I have to make dinner I might as well bring in the kiddos to help me out, it will give them something to do and give us all time together. Sure there might be a few more messes and things might take a bit longer, but I’m spending quality time with my kids while accomplishing tasks (and I don’t have to do things like wash veggies anymore!).


Tips for getting your kids in the kitchen:

1. Take a deep breath and think of this as a late afternoon activity together with your kid.

2. Let go and let your kid have some control – it’s ok if it doesn’t look perfect and uniform. (an easy way to get egg shell out of the bowl of eggs it to use a piece of the shell!)

3. Make sure you talk to them about safety – like knives and sharp things and the hot stove, importance of hand washing and not putting fingers in mouth with raw chicken on them, etc.

4. I toss whatever veggies we having in the sink and let the kids wash them – they love this.

5. The kids either stand or kneel on a chair with a back on it and if they are working at the sink I put the back to the side that is away from me, I can catch them from my side or the back. If they are working at the stovetop I put theback of the chair against the front of the stove. This way if they lean forward they can grab the chair back, NOT the hot stovetop.

6. When beginning a dish, like adding olive oil and onion to pan, don’t turn the burner on until after they have tossed in the ingredients. This takes care of the pops and sizzles that bounce out to burn tiny arms.

7. When using the mixer I never plug it in until I am ready to turn it on and I unplug it when I turn it off. You never know when little hands will get curious with switches.

8. Remember if you are adding liquid to a hot pan it will steam and steam can burn, so add a little liquid to cool off the pan, then let your kiddo add the rest.

9. A great way to add veggies or chunks of anything to hot liquid is to use a spoon – there’s less splashing and hands are further away from the splash zone.

10. My kids and I like kid utensils, like plastic knives and measuring cups/spoon from "The warehouse" and regular table knives work great too.

11. Kids are great at grating, peeling and slicing soft fruit and veggies (strawberries, cucumber) with supervision.

12. Let your kids get creative, go through recipe books and let them pick out what to cook or for a more experienced mini chef, let them create a recipe.

Tonight James choose a recipe for dessert: "Peach upside down cake"

For the topping:
25g melted butter
1/2 cup brown sugar
1 tin drained peach slices

For the cake batter:
1/2 cup white sugar
1 egg
1 teaspoon vanilla essance
1 1/2 cups flour
2 teaspoons baking powder
1/2 teaspoon salt
1 cup milk


Spread the topping mixture into a 20cm tin or dish, Arrange the drained fruit on top in the tin


Cream the butter, white sugar and egg together, then add the vanilla essance


Sift in flour, baking powder and salt
 
 
Add milk and mix well


Spread mixture evenly over fruit
 
 
Bake for 30-40mins @180c, Once cooked stand for 5 minutes then turn out on to a plate
 
 
Delish served with whipped cream and ice-cream!!

Friday, October 12, 2012

Play Dough Fun

PLAY DOUGH is something every child loves to play with and something every adult remembers. This simple doughy stuff can be transformed into an infinite number of shapes and forms – the only thing your child has to add is his or her imagination.
Working with play dough allows your child to express and develop their creativity from an early age. It requires neither special tools nor the mastery of difficult techniques. Just give your child a lump and they’re away, entering worlds of dinosaurs, spaceships, pirates, fairies, racing cars…


But times are tough and buying the commercially made product might be more than the weekly budget can stand. Fortunately, help is at hand – you can make play dough at home for a fraction of the cost.
 
Heres the recipe we use:
 
  • 2 cups of plain flour
  • 1 cup of salt
  • 2 tablespoons of vegetable oil
  • 2 cups of water
  • Food colouring
  • A saucepan
  • A wooden spoon
    • Place the water, oil and food colouring in the saucepan.
    • Slowly mix in the flour and salt.
    • Place the saucepan over a medium heat and stir constantly.
    As the ingredients heat they will form a dough that looks like very stiff mashed potatoes. Once this dough begins to pull away from the sides of the saucepan remove it from the heat and allow it to cool.
    When the dough is properly cool, knead it thoroughly until it achieves a smooth texture.
    If the dough still feels sticky after you’ve done this, it means you haven’t cooked it long enough. You can return it to the heat to dry it out a little more and then knead again.


    If you want to make several colours of play dough, but don’t want to go through the cooking process over and over again, you can make the play dough as above but omit the food colouring.

    Then, separate your play dough into several batches. Form each batch into a rough ball and make a depression in its centre. Add a teaspoon of liquid food colouring to each depression and knead until the colouring is evenly mixed through the dough.

    If the colour is not strong enough, simply add a little more and knead through again.


    Storage
    Your homemade play dough, though it will provide hours and hours of fun, does have a finite lifespan. Eventually it will dry out to a point where it is no longer fun to play with. When this happens you’ll have to throw it away and make some more.
    You can, however, prolong the life of your play dough dramatically by storing it when not in use in a zip-loc bag or containers in the fridge.

    Thursday, October 11, 2012

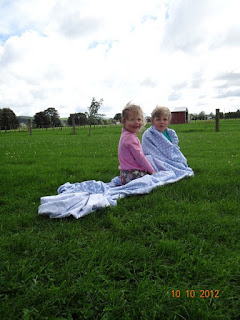
    A Sheet load of fun!!

    The outdoors is the very best place for preschoolers to practice and master emerging physical skills. It is in the outdoors that children can fully and freely experience motor skills like running, leaping, and jumping.
     
     
    Who knew playing with a sheet could be so much fun!
     
     
    When parents think back to their own childhoods, chances are some of their fondest memories are of outdoor places and activities. (I know most of mine are!)


    When we show an appreciation for the great outdoors, the children in our lives will follow our lead.
     
     
    Almost half of preschool children aren't taken outside
    to play by their parents on a daily basis.....


    Next time when you take your children to a park or beach, allow them to explore. Let them decide which trails to take. Stay nearby for safety, but don't interfere or help unless asked.

    Chocolate Brownie anyone?

    This week’s I-dare-you-to-look-away recipe came from the kids great grandma.
     
    White Chocolate Brownie

     
    I’d been dying to make these brownies since forever and finally managed to bake them today. I've had the recipe sitting in the back of my cookbook or years but have never got around to trying this super EASY recipe. (dont know why I didnt try it before now). Its differnatly a keeper and will be the go to recipe for choc brownie.


    These are definitely a good middle of the road brownie – not too fudgy and not too cakey; very much so what you’d think of when you think “classic brownie”. If anything, they’re a little more on the fudgy side than the cakey side.

    Recipe
    Melt 140g Butter, then beat for 2mins or until pale
    Add 4 eggs and 300g sugar beat till fluffy
    Then stir through 150g flour, 1 tsp baking powder and 75g cocoa powder
    add 100g chopped walnuts (I used white choc buttons instead)
    Spread in a slice tin and bake for 20mins @180c
     
    I’m not sure I’ll ever need to use another brownie recipe ever again.
    Pure perfection (I underbaked just a bit… but only because I couldn’t wait any more).


    So…THAT is what brownies are supposed to taste like!!! They are the best brownies I have ever made!